Colour temperature is an important aspect of photography in ensuring accurate colour reproduction in a scene. Incorrectly setting the colour temperature or white balance on your camera can lead to (in most cases) undesirable colours casts in our images which cannot be easily corrected in post-editing when shooting in compressed formats such as JPEG.
In photography, most of us encounter colour temperature for the first time when we see the auto white balance (AWB) on our cameras and wonder what all all those numbers (2800K, 5000K, and so on) actually mean. And, in any case, how can colour have a temperature!?
What is Colour Temperature?
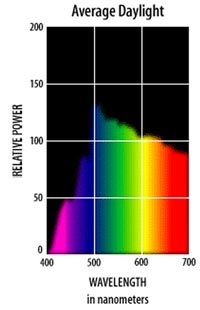
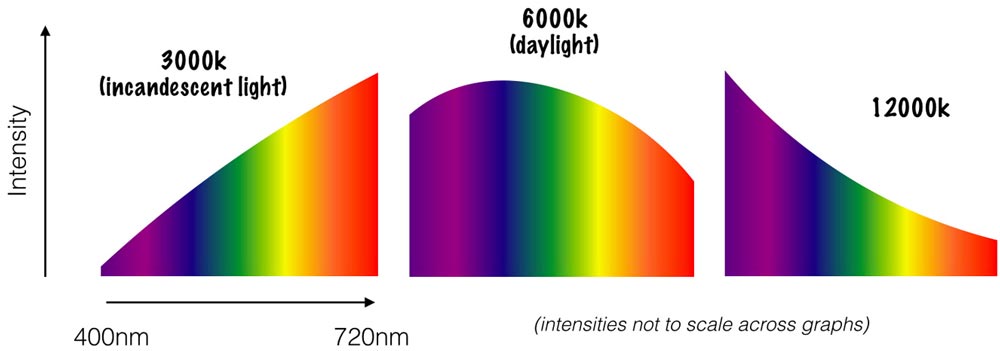
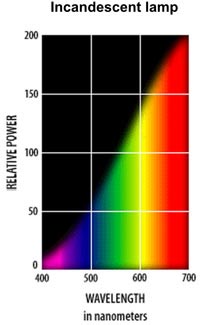
Spectral Power Distribution (SPD) graphs are used to show the composition of visible light. To the left you can see the SPD for daylight. Note how the intensity peaks around 500nm—moving into the bluer end of the spectrum (note that the colour of the sky is actually due to Rayleigh Scattering, however). Incandescent sources (e.g. a house lamp) have SPDs weighted towards the red/yellow end of the spectrum. Both these light sources give out what we would consider to be “white light” but the compositions vary widely.
It would take another 300 years or so from the time of Isaac Newton before science discovered a way to objectively describe each of these SPDs with a single variable.
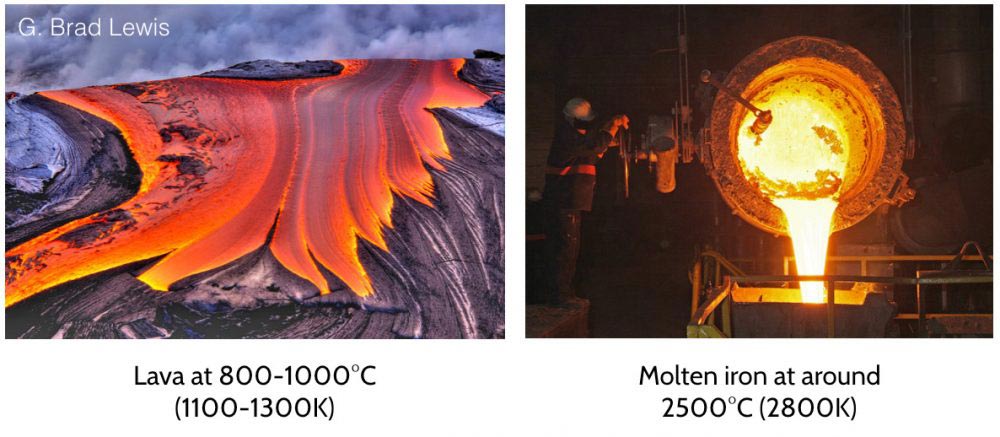
Now let’s fast-forward that 300 or so years. Enter the German physicist, Max Planck. He had been tasked with finding the optimum temperature at which a filament would produce the most light using the least amount of electricity. In doing so, he came up with Planck’s law which describes the electromagnetic radiation of a black-body radiator object which is at a constant temperature—and a filament inside a lightbulb is pretty close to a perfect black-body radiator. Essentially, his law gives the shape of the SPD curve Hank would emit if we were to heat him up to different temperatures.
Here is what his SPD would look like at 3000K, 6000K, and 12000K (remember, we are only looking at the SPD across the visible spectrum).
What’s all this got to do with my photographs?
Our brains process the information we see, turning the “raw data” from our retinas into the colours as we understand them in the context of our surroundings. And at this our brains are exceptionally good. This is why a white piece of paper will appear white to us whether viewed in broad daylight or under a tungsten lamp.
Our camera needs to assign a colour temperature to an image so that it knows how to adjust the colours in the SPD to make the final image look natural to us. Now any given scene will have its own SPD, and by finding a colour temperature whose SPD most closely resembles the SPD of our scene our cameras have a basis off which they can run their algorithms and adjust the colours so that the final image produced is what we think we saw with our own eyes.
At at doing all this they are usually pretty good, which is why we don’t often find ourselves manually adjusting the colour temperature in post-editing. However, they can still be fooled—more often than not by a cheap tungsten bulb—and so we have to help them out every now and again by telling them the environment in which they’re about to take the photograph.
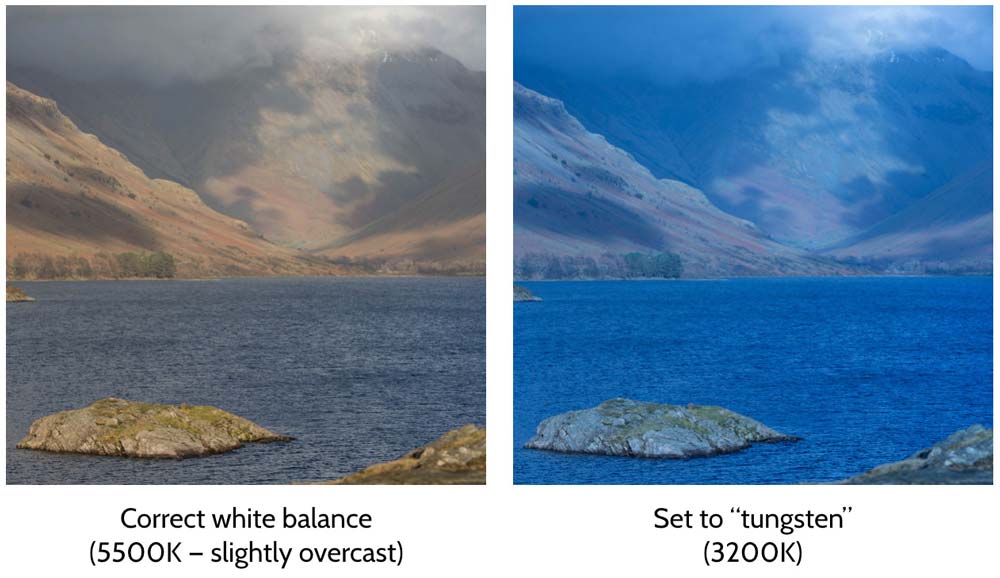
To give a reverse example, let’s say, for instance, that you want to take a picture on an overcast day but you deliberately go into the camera’s white balance menu and set it to ‘incandescent’ or ‘tungsten’. Well, the camera now assumes that you have an incandescent lamp as your light source and sets the colours temperature to around 3000K. It then compensates for the sloping of the SPD towards the red end of the spectrum by pushing up the relative intensity of the bluer colours. The camera’s auto white balance metering got it correct—and then we said: ‘No, you need to push out the bluer end of the spectrum otherwise it will look strange to us’. The result of this incorrect setting can be seen below.
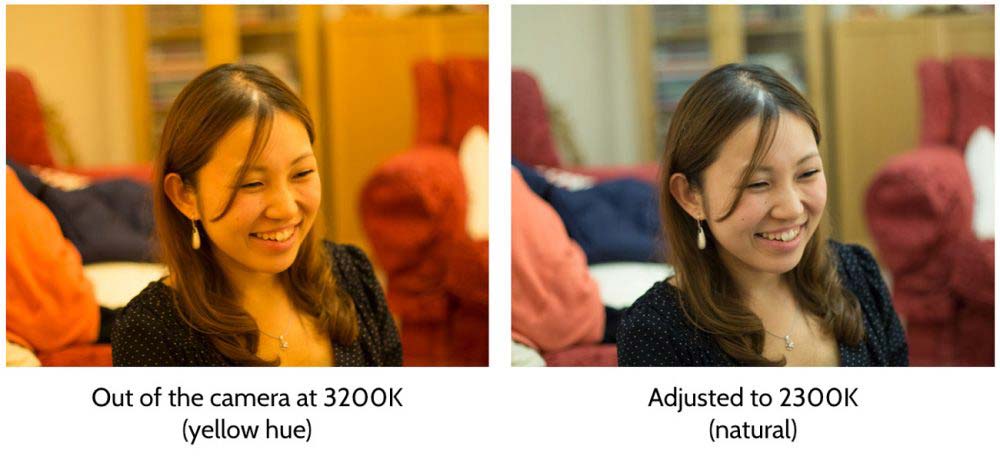
One common (and understandable) point of confusion when adjusting the white balance in post-editing is that the slider on Lightroom (or similar programs) appears to do the opposite of what you might intuitively expect. In the photograph of the girl above, we had to push the slider to the left and lower the colour temperature to get a more natural scene. But pushing the colour temperature down should accentuate the red end of the spectrum further and we’d end up with an even worse colour cast to the image, no?
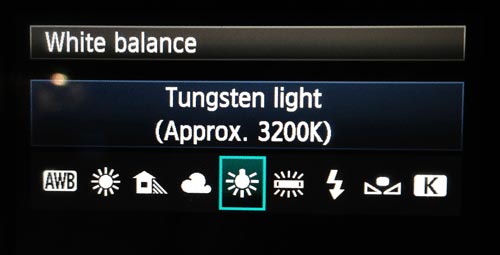
In fact, the slider in Lightroom is assigning a colour temperature to the image, not ‘creating’ an SPD for the scene. Remember, once the camera has assigned a colour temperature to the image it then adjusts the colour intensities so that the final product looks natural to us. Another way to think of the slider is by imagining that you are telling Lightroom what colour temperature the camera should have assigned to the scene before the photograph was taken. For the photograph of the girl, by giving it a setting of 2700K (versus 4000K the camera originally estimated) you’re telling the camera to push up the intensities of the bluer colours even more. This is why you’ll see symbols for scenes with various colour temperatures in Kelvin in the camera’s white balance menu.
| Temperature | Source |
|---|---|
| 1,800K | Candle flame |
| 2,700-3,300K | Incandescent candle |
| 4,100K | Moonlight |
| 5,000K | Horizon daylight |
| 6,500K | Overcast |
| 10,000+K | Clear blue sky |
Of course, there are no hard and fast rules here. And you can play around with the colour temperature settings as you like until you’re happy with the output.
