There is a trend among manufacturers—beginning really with Nikon and the release of the D800E in 2012—to remove the anti-aliasing filter from digital cameras. Anti-aliasing filters are optical low-pass digital filters which essentially blur the image to a fractional degree in order to avoid moiré and false colour.
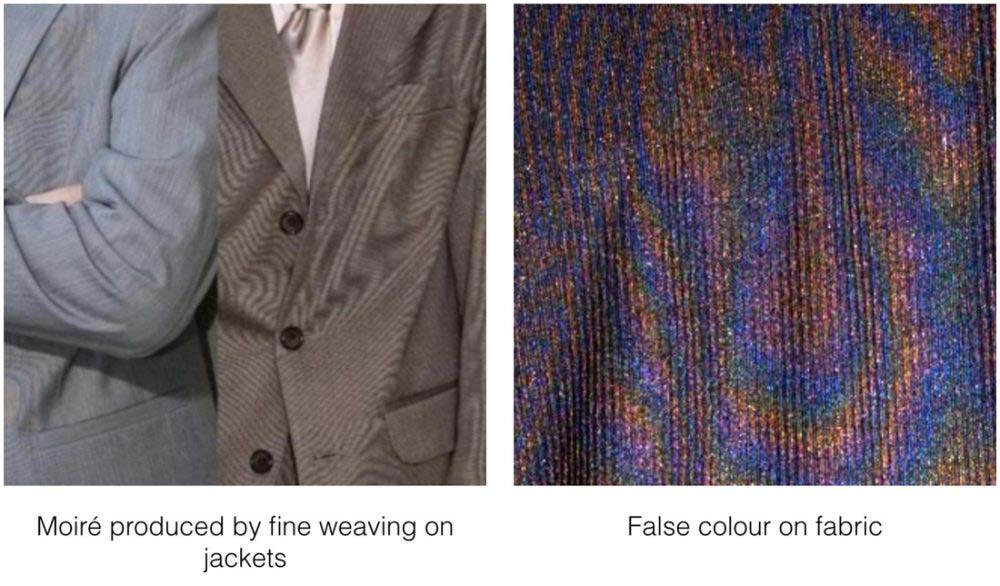
Moiré and false colour occur in digital photography where the level of detail in a pattern exceeds the resolution of the sensor (e.g. weaving in a fabric, fine mesh photographed from a distance). Moiré appears in the form of maze-like patterns not native to the original image and false colour in the form of colour transformations across the surface of the subject (again, not native to the original scene). The presence of false colour is exacerbated by the structured layout of the Bayer filter layout used in most digital camera sensors.
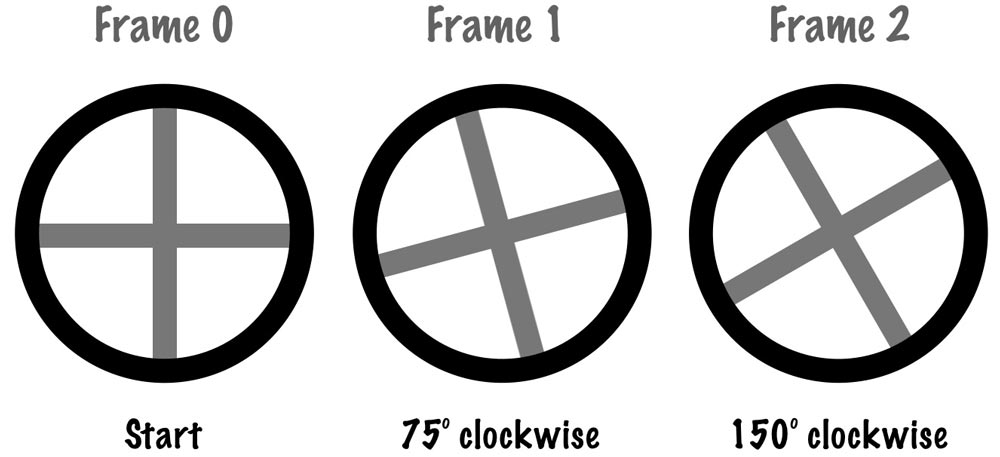
In digital photography we’re concerned with spatial aliasing; in other words, the density of the sensor (in terms of pixels per area) versus the density of the pattern we are trying to photograph. However, it is perhaps easier to grasp the concept by thinking first of temporal aliasing. Say you film a 4-spoke wagon wheel at a film rate of 24 frames per second and the wagon is moving at such a speed that its wheels rotate 5 times per second. Then at each film slide the wheels have rotated 75° clockwise (5 x 360°/24) but in fact it will appear to the observer watching the film that the wheel has moved backward 15°. Equally, at 6 rotations per second the spokes will move 90° and the wheel will appear to be stationary. This is a common example of temporal aliasing.
Aliasing (and thus moiré) is usually most obvious when the frequency of the pattern is close (but not equal) to the sampling frequency. By slightly blurring the image the anti-aliasing filter is lowering the frequency of the pattern to a level below the sampling frequency, but is doing so at the expense of image sharpness. This is why choosing a lower aperture (or higher f-number) can also reduce moiré as the onset of diffraction helps to reduce image sharpness (equally, it is usually most obvious under the best lens conditions for sharpness—ƒ/8 and centre of the frame). Generally speaking, it is less of an issue in landscape photography where the presence of fine repeating patterns is rare.
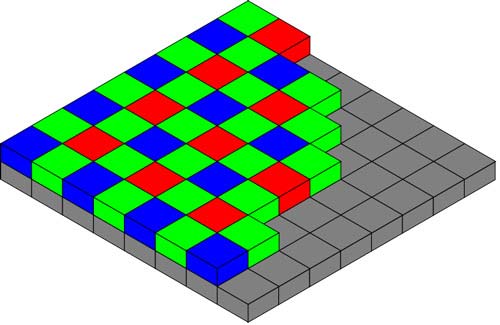
False colour is a result of the structured pattern of the Bayer filter which consists of rows of RGRGRG or BGBGBG. This is an issue because the spacing between pixels of like colour is greater than the spacing in the image in areas of fine detail. This is especially an issue for the red and blue channels where the frequency is half of that of the green. Note also that all horizontal and vertical lines in this arrangement lack either red or blue pixels.
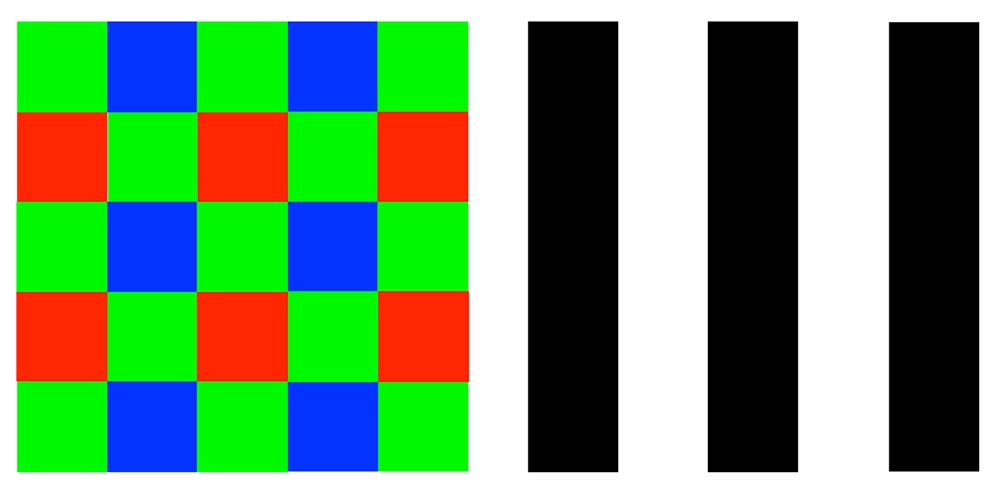
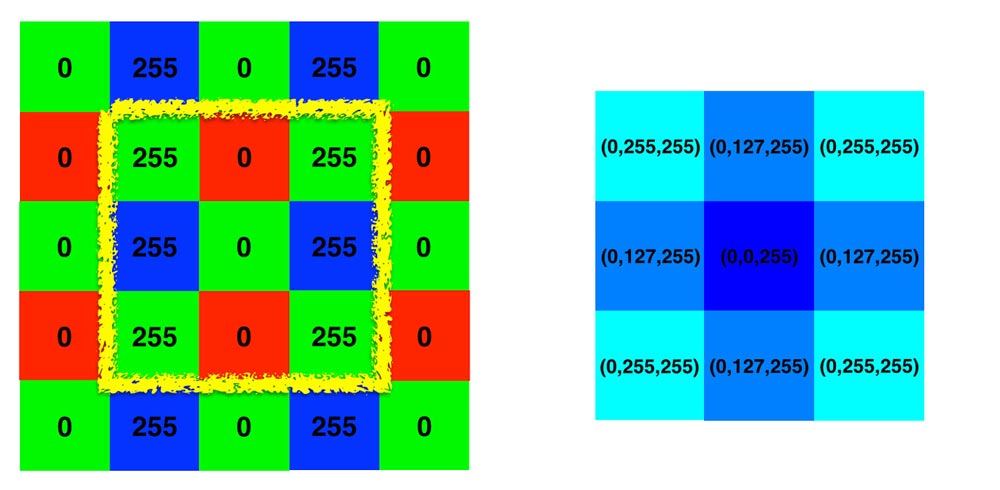
Here we have a Bayer filter attempting to record three vertical black lines that are the exactly same size as the sensor area below (and so do not cover any blue pixels).
We record the luminance value at each pixel point. Black has an RGB value of (0, 0, 0) and so the only two values recorded are either 0 or 255. We then run an algorithm to extrapolate the RGB for each pixel that says for each of the other two colours each pixel will take the average value from the surrounding 8 pixels relating to that particular colour (we’re only going to do this for the centre pixels surrounded by the yellow line).
For example, the top-middle red pixel in the yellow box… RED: this is a red pixel so it records its own value, 0; GREEN: 4 pixels in the surrounding 8 are green, 2 have a value of 255 and 2 have a value of 0, so the average of 127 is recorded; BLUE: 4 pixels in the surrounding 8 are blue and all have a value of 255 so 255 is recorded. This gives (0, 127, 255).
Anti-aliasing filters
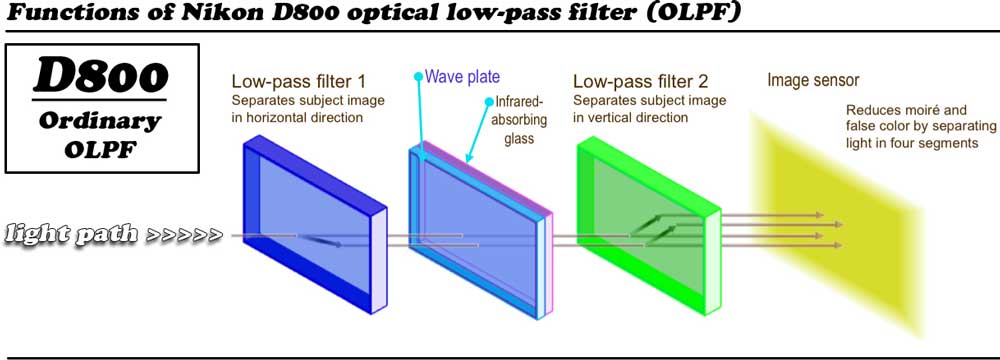
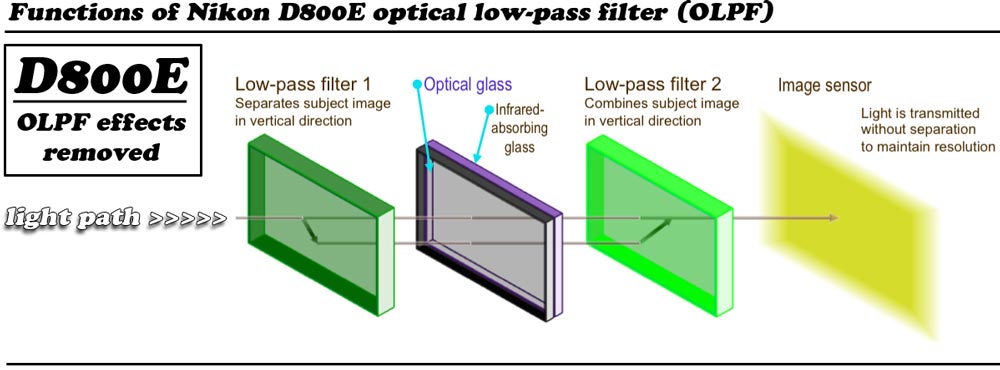
In digital cameras anti-aliasing filters typically work by splitting a point of light into four individual points as shown below in these diagrams from Nikon for the D800 and D800E. This splitting of the light increases the chance of colours being captured by one or more pixel in that vicinity and thus limiting moiré and false colour; however, by effectively spreading the light ray over a greater area the cost is a decrease in overall image sharpness.
Moiré and false colour was much less of an issue with film cameras because the photosensitive grains within the film were arranged in a random fashion (especially effective at reducing false colour). Medium format digital cameras, owing to their large sensors and high resolution don’t require the use of an anti-aliasing filter.
Generally speaking, up until now anti-aliasing filters have been a standard inclusion — presumably because it’s thought that consumers are be more likely to notice the formation of strange patterns in certain images over a minuscule increase in overall sharpness. But as the smaller format sensors increase in resolution we’re likely to see more manufacturers drop the anti-aliasing filter from systems—even the Olympus E-M1 (a micro 4/3 system) comes without.
Dealing with moiré
False colour can be quiet easily dealt with in post-editing—Lightroom 4 onwards has a special moiré adjustment brush which does a pretty good job at eliminating colour transformations. However, moiré resulting in maze-like artifacts and distortions is nearly impossible to remove in post-editing and needs to be addressed by altering composition or angle, using a different focal length, a lower aperture, etc.
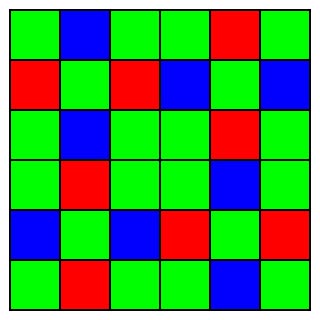
Moiré presents a significant challenge as resolutions in digital cameras increase and so manufacturers have come up with ways to mitigate its effects. Fujifilm, for instance, has adopted a 6×6 layout structure on its sensors (as oppose to the standard 2×2 layout) which means that all lines of pixels will contain each of the three primary colours. Foveon have produced a different design of sensor altogether (the “X3”), which layers the colours in much the same way film emulsion did in order to avoid the problems that arise from a 2D RGB sensor layout. The technology is used on Sigma’s high end DSLRs.
